

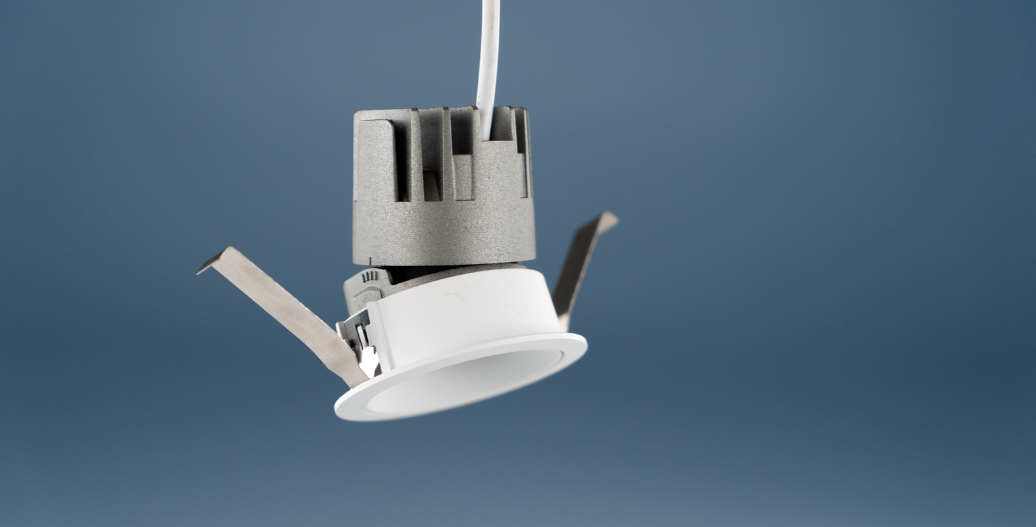

Can You Install Recessed Lights on a Sloped Ceiling Without a Junction Box?
Vaulted ceilings, cathedral ceilings, and other sloped surfaces can create challenges when planning recessed lighting. You need fixtures that fit the ceiling, provide the right light output, and work with your electrical setup.
The good news is that can-free recessed lights install directly into a cut-out in the ceiling, without a traditional recessed can or housing. Depending on the model and power system, you may also be able to avoid installing a junction box at every light location.
Here’s what to consider when selecting recessed lights for a sloped ceiling.
The Short Answer:
- Low-voltage systems: With a 12VDC or 24VDC system, the lights connect back to a remote power supply. A junction box is not needed at each light location, subject to confirmation of applicable code requirements.
- 120VAC systems: Each light includes a driver box. For 3.15-inch and larger fixtures, the driver box fits through the ceiling cut-out. For 2-inch and 2.25-inch fixtures, you need access from above or a remote driver.
- IC rating: Confirm whether the fixture is rated for direct contact with insulation before installing it in an insulated ceiling.
- Ceiling pitch: Check the maximum supported slope for the specific fixture before finalizing your layout.
Always follow the National Electrical Code (NEC), applicable local codes, and the fixture’s installation instructions. Consult a licensed electrician if you are unsure which requirements apply.
Do Sloped-Ceiling Recessed Lights Need a Junction Box?
Every installation needs appropriate electrical connections. The key is understanding where those connections are made and how the fixture is powered.
Our can-free round recessed lights offer low-voltage and 120VAC options, but their installation requirements differ.
| System |
Where the Connections Are Made |
What to Know |
| Low voltage (12VDC or 24VDC, Class 2) | At a remote power supply, not at each light | No junction box at each light location. Keep the power supply accessible, ideally within about 100 feet of the lights. Most customers choose 24VDC. |
| 120VAC, 2" and larger | In the driver box that comes with the light | The driver box fits through the cut-out hole. With 3.15" lights, you may need to widen the hole slightly on two sides. |
It is recommended to use a rough-in plate to install the recessed lights. It will allow everything to fit in the ceilling because the 2" and 2.25" are small, the rough in plates are designed with a notch on one edge to expand the hole to accommodate its driver. This additional space will not be visible after the fixture is installed.
What is an IC Rating, and Why Does It Matter?
An IC-rated recessed light is designed for direct contact with insulation. This is especially important when installing lighting in vaulted and cathedral ceilings, where insulation may extend right up to the back of the ceiling drywall.
Before choosing a fixture, verify its insulation contact rating and do not assume based on the fixture’s size or installation style.
You should also confirm whether the fixture is suitable for the environmental conditions of the installation, including damp or wet locations where applicable.
| Model |
IC rated for Insulation Contact |
Suitable Uses |
| 2.25" Ultra Bright (3W) | Yes | Dry, Damp or Wet Locations |
| 3.5" Standard Bright (3W) | Yes | Dry, Damp or Wet Locations |
| 3.5" Ultra Bright (9W) | Yes | Dry, Damp or Wet Locations |
| 3.5" Single Array (10W) | Yes | Indoors or Outdoors - Dry or Damp Locations |
| 4.2" (6W) | Yes | Dry, Damp or Wet Locations |
| 5.2" (12W) | Yes | Indoors or Outdoors - Dry or Damp Locations |
| 5.4" Standard Bright (9W) | Yes | Indoors or Outdoors - Dry or Damp Locations |
| 6.3" (18W) | Yes | Indoors or Outdoors - Dry or Damp Locations |
| 2" Stratus LED Recessed Light | Yes | Indoor & Damp Locations |
| 3" Stratus LED Recessed Light | Yes | Indoor & Damp Locations |
| 3" Stratus Mud-In LED Recessed Light | Yes | Indoor & Damp Locations |
Choosing Recessed Lights for Your Ceiling Pitch
Not every recessed light is designed for every ceiling angle. A fixture intended for flat or sloped ceilings may have specific limits on how steep the ceiling can be while maintaining the intended light direction.
All of our recessed lights are made for flat or sloped ceilings, other than the 2" and 3.15" that are made for flat ceilings only. The pitch range for all of our recessed lights are adjustable to 22.5 degrees and will accommodate a 6/12 pitch.
For product selection, start with the actual ceiling pitch and the direction you want the light to shine. Confirm the fixture’s supported range before cutting holes or ordering materials.
How to Install Can-Free Recessed Lights on a Sloped Ceiling
Once you have selected a suitable fixture, plan the installation around the ceiling layout, available space, and power requirements.
1. Plan your lighting layout
Space the lights according to the room, ceiling height, fixture output, and desired illumination. As a starting point for primary lighting, we recommend:
| Light Output |
Distance From Each Wall |
Distance Between Lights |
| 6W | 2 to 3 feet | 4 to 5 feet |
| 9W | About 3 feet | 5 to 6 feet |
2. Select the power supply
For low-voltage installations, calculate the total wattage of all connected lights, add 20 percent, and round up to the next available power supply size.
For example, six 9W lights have a combined load of 54W. Adding 20 percent brings the required capacity to 64.8W, so an 80W power supply is the appropriate size based on this calculation.
Never use an MLV-style dimmable power supply with these recessed lights. Confirm driver compatibility with the selected dimming method and fixture.
3. Cut the ceiling openings
Use the specified cut-out diameter for the selected model. These fixtures accommodate ceiling materials up to 1.25 inches thick.
We highly recommend using the rough-in brackets for our Round Recessed Lights. They make installing the recessed lights in new construction applications a breeze.
4. Run the wiring
Use UL listed, in-wall rated, stranded, two-conductor wire rated for at least 300V, and leave 6 to 8 inches of wire at each light location. Wire in parallel. Follow the applicable wiring instructions and code requirements.
5. Connect the driver or power supply
Make the electrical connections at the remote power supply for low-voltage installations or at the driver box for 120VAC fixtures. Maintain correct polarity where applicable and follow the fixture's wiring instructions.
6. Install the fixture
Lift the spring-loaded retention clips, insert the light into the ceiling opening, and allow the clips to secure the fixture.
Installation tip: The retention clips are spring-loaded and can snap back quickly. Keep your fingers clear while handling them.
7. Plan for new construction
For new construction, a rough-in plate can help establish fixture locations before drywall is installed. Fasten the plate to the joists, then use it as a guide for cutting the openings after the ceiling is finished.
For detailed instructions, refer to the appropriate recessed light installation guide.
Frequently Asked Questions
What is an IC-rated recessed light?
An IC-rated recessed light is designed for direct contact with insulation. Verify the rating of the specific model before installing it in an insulated ceiling.
Can I use recessed lights on a vaulted ceiling?
Some recessed light models are identified for flat or sloped ceilings. Suitability depends on the specific model and its maximum supported ceiling pitch.
Do I need a junction box for each recessed light?
For the described low-voltage configuration, the lights connect to a remote power supply rather than requiring a junction box at every light location. For 120VAC fixtures, each light includes a driver box. Installation must comply with applicable electrical codes.
What is the thickest ceiling these lights fit?
The fixtures described in this guide accommodate ceiling materials up to 1.25 inches thick. Check the installation guide for your selected model.
Explore aspectLED Recessed Lighting Resources
Use these resources to compare fixtures and plan your installation:
-
Recessed Lighting Collection: Explore recessed lights, including models identified for flat or sloped ceilings.
- Can-Free Round Recessed Light Installation Guide (2” to 4.2”): Review installation instructions for compatible models.
- Can-Free Round Recessed LED Light Installation Guide (5.2” to 6.3”): Find installation guidance for larger fixtures.
- Stratus LED Recessed Light Installation Guide: Review installation instructions for our newest Architectural Recessed Lighting.
- Power Supplies and Dimmers: Add the appropriate aspectLED resource once the destination URL is confirmed.
The right recessed light starts with the details of your installation. Confirm ceiling pitch, insulation contact requirements, driver access, and fixture dimensions before you cut the first hole.


